Installation procedure

- If Microsoft .NET Framework is not installed, the installer for .NET Framework is started. Install .NET Framework first.
- Download the RasterLink7 installer from our official site (https://mimaki.com/download/software.html) .
- Double-click the file downloaded.
- The file unzips automatically.
- The unzipped installer folder will be saved to the desktop.
Delete the folder after installation is complete.
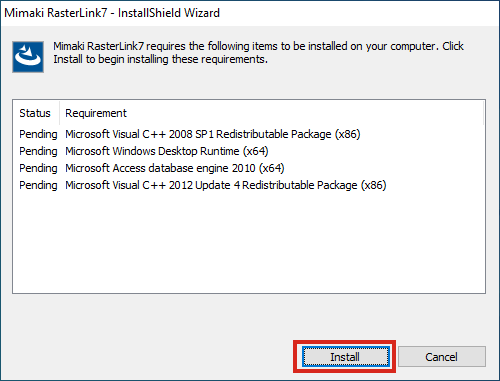
- The following window appears. Click [Install].

- The following dialog may appear if a Microsoft Office product has already been installed. If this appears, click [Yes] to continue with installation. (The dialog appears because the system is attempting to reinstall modules that are already installed. RasterLink and Office products are not affected.)

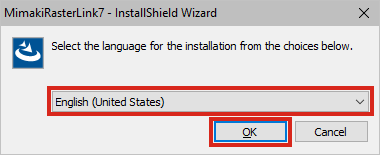
- Select the language of your choice during installation, and click [OK].
- Click [Next].
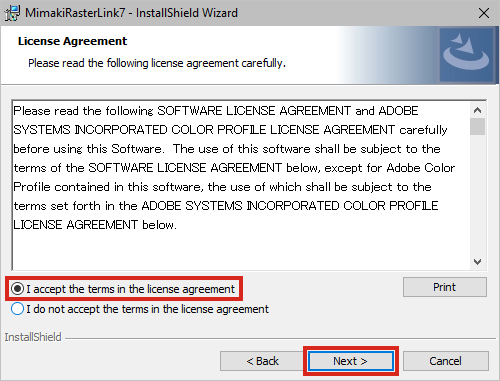
- Select [I accept the terms in the license agreement], then click [Next].
- Specify an installation destination and click [Next]
- Specify a drive with the sufficient free space.
- Click [Install].
- Installation starts.
- When the installation of RasterLink7 finishes, click [Finish].
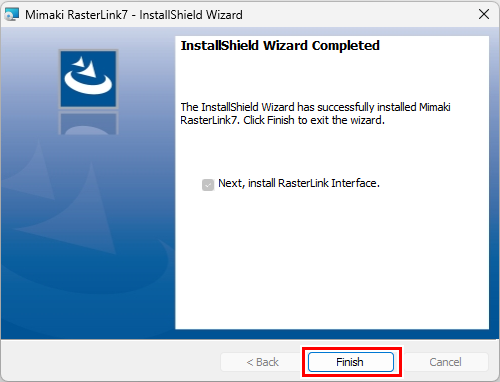
- The RasterLink Interface installer then starts up.
Follow the on-screen instructions to install RasterLink Interface.
For details, refer to the separate "RasterLink Interface Installation Guide".
- After RasterLink7 is installed, never remove any folders or files from the installation folder or rename any of them.