When the RasterLinkPC has Internet access
- Start the license activation screen.
- From the [Start] menu, select [All apps] - [Mimaki RasterLink7] - [License].
- Select [Activate] and then click [Next].
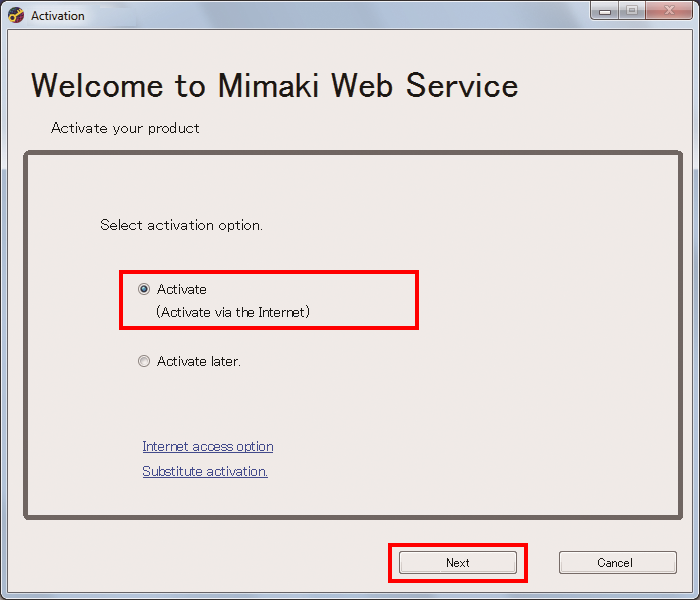

- If you are using a proxy server, then click [Internet access option] and configure the settings.
- Configure the settings and click [Next].
- The activation process is started.
- When the license is activated successfully, the process is completed.
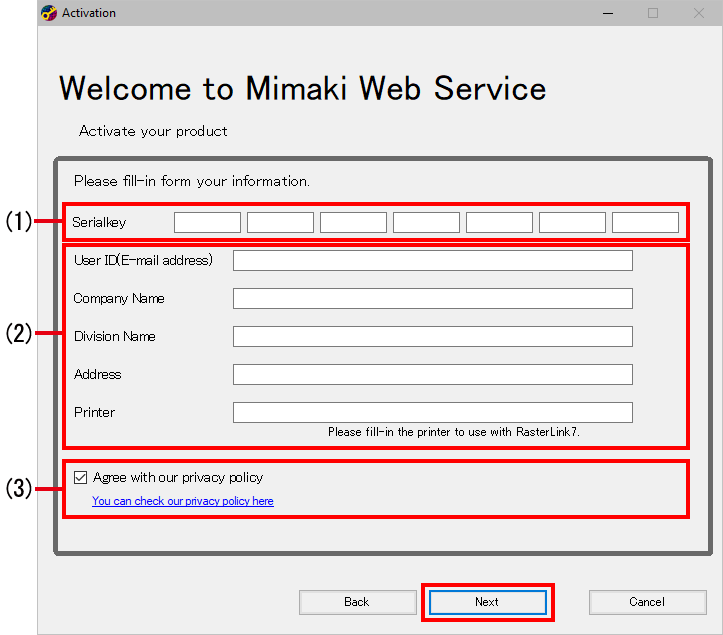
(1) | Serialkey | Enter the serial key indicated at the inside of the lid for the package. |
(2) | User ID (E-mail address), Company Name, Division Name, Address, Printer | Fill in any of the fields as required. |
(3) | Agree with our privacy policy | Read the privacy policy on our official site (https://mimaki.com/privacy.html), and select the [Agree with our privacy policy] check box. When the check box is selected, [Next] is enabled. |

- If you are using a personal firewall, a connection confirmation screen may appear. In this case, allow the connection.