Workgroup Settings
Set the RasterLink PC so that it can join the workgroup named "WORKGROUP".
If joining a domain network, consult with network administrators regarding the network being used.
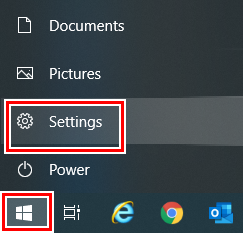
- From the [Start] menu, click [Settings].
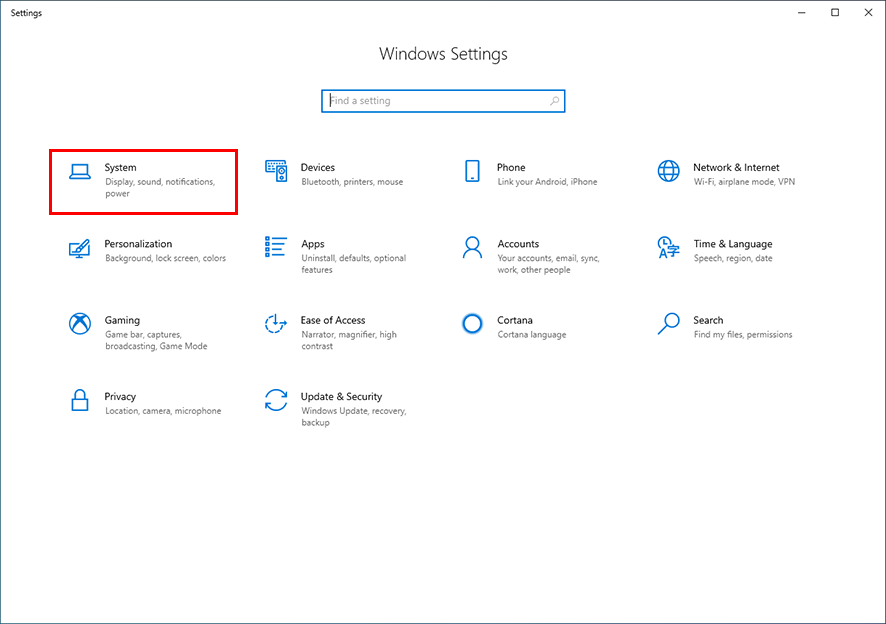
- Click [System].
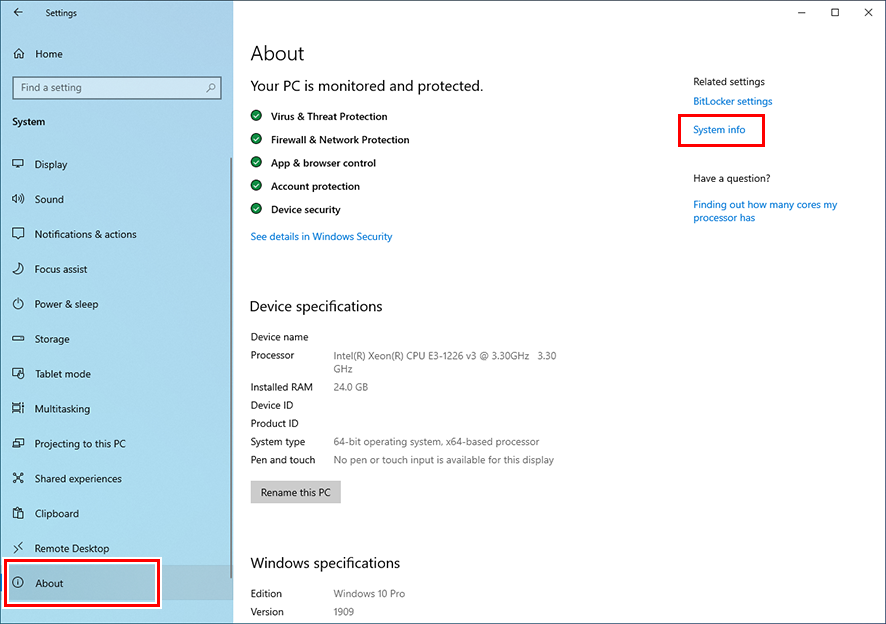
- In the left pane, click [About], then click [System info] or [Rename this PC] in the right pane.
- If you clicked [Rename this PC], go to step 5.

- For Windows 11
After clicking [About] in the right pane, click [Domain or workgroup] and go to step 5.
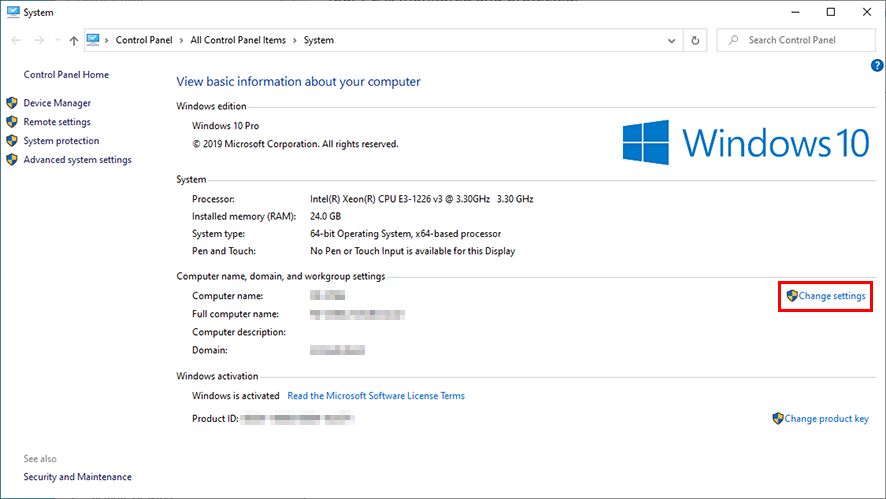
- Click [Change settings].
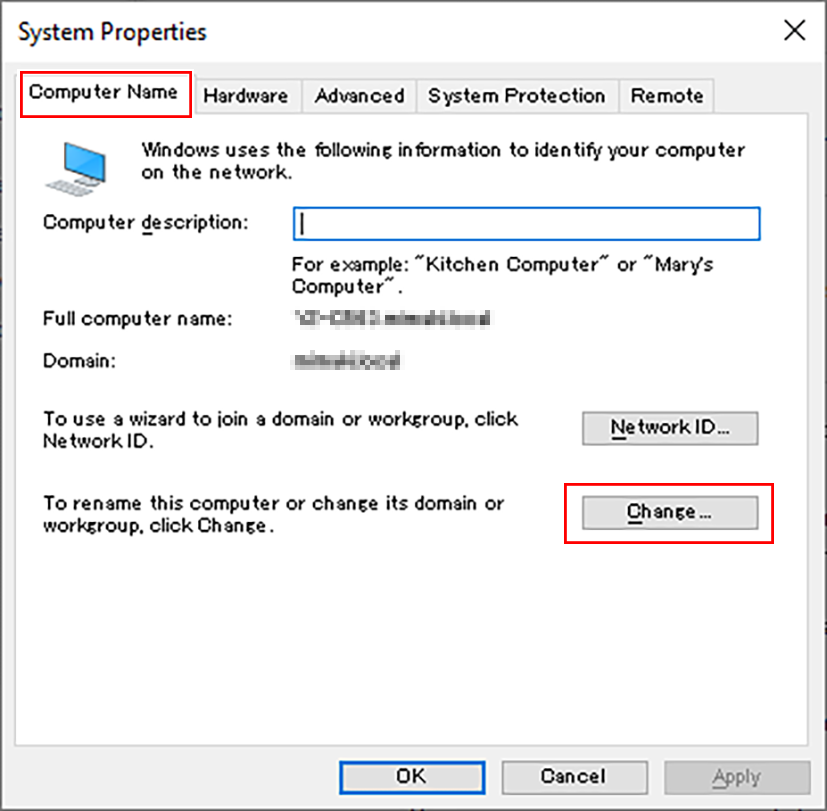
- Click the [Computer Name] tab, and then click [Change].
- Change to [WORKGROUP], and then click [OK].
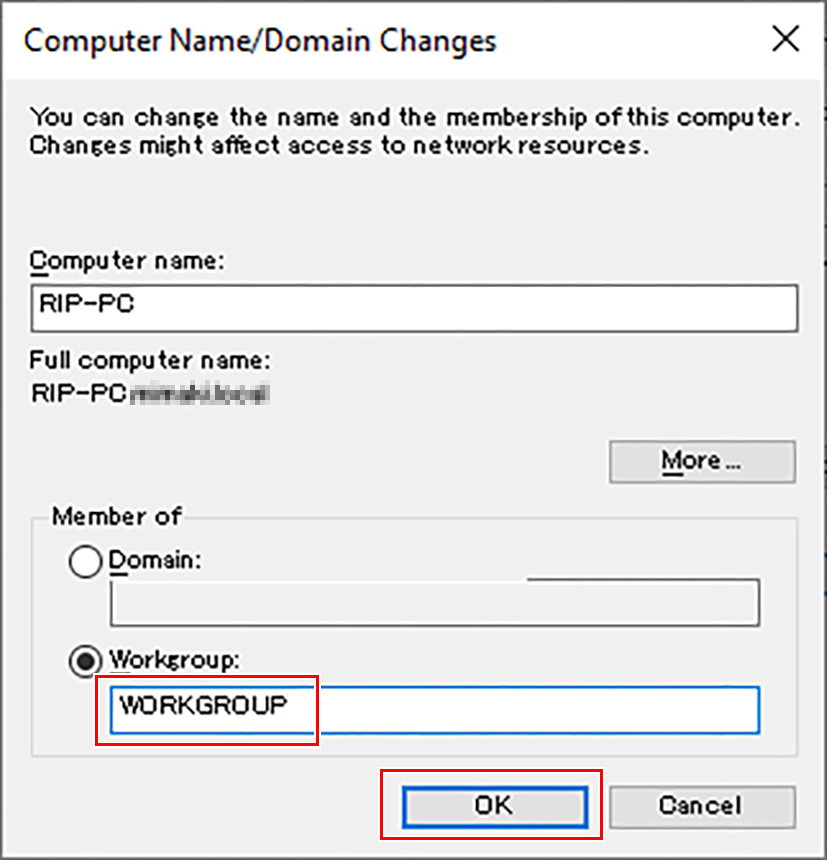

- Enter the workgroup name using single-byte alphanumeric characters.
- Input alphabet characters using capital letters.
- It is not necessary to change the [Computer Name].
- Click [OK].
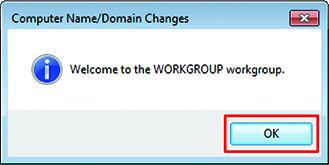

- This screen is not displayed when the workgroup name is not changed.
- When the confirmation screen is displayed, click [OK].
- Do not restart the computer yet.
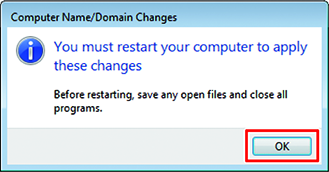
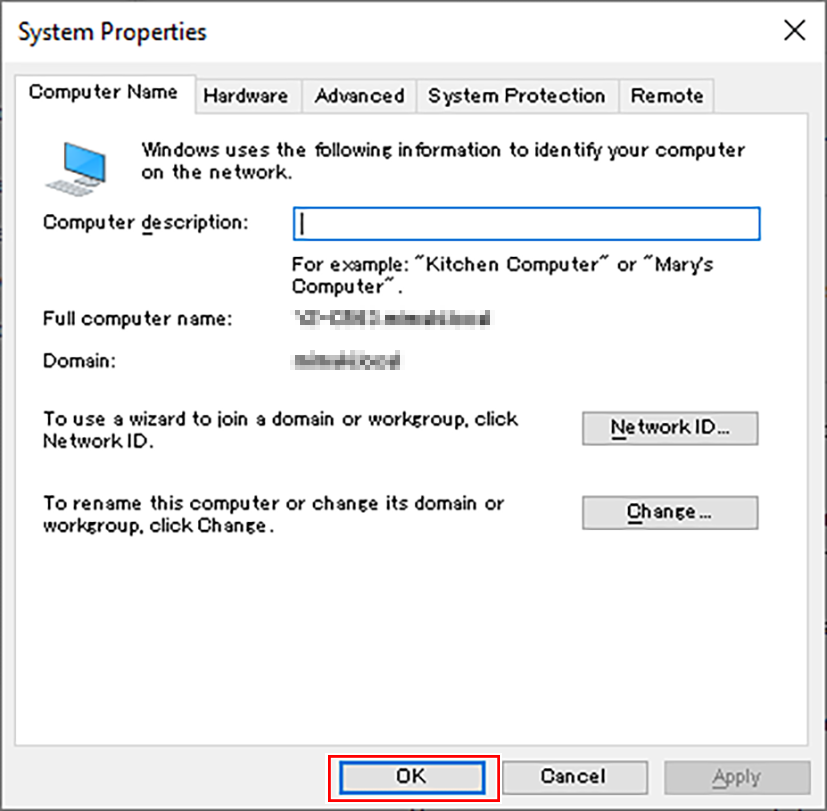
- In the [System Properties] screen, click [OK].
- Click [Restart Now].
- The PC is restarted.


