- Advanced Operations
- Operation Details
- Twin Roll Printing
- Twin Roll Printing - Operations
 Twin Roll Printing
Twin Roll Printing - Operations
Copy a job and print on two rolls
- Select one job on the [Job List] tab.
- Select [General Print].
- Set the number of copies in [Copy] on the [Image Edit] tab.

- Check [Left Roll Detect Position], then enter the print origin for the left roll in [Left Roll Layout Position].
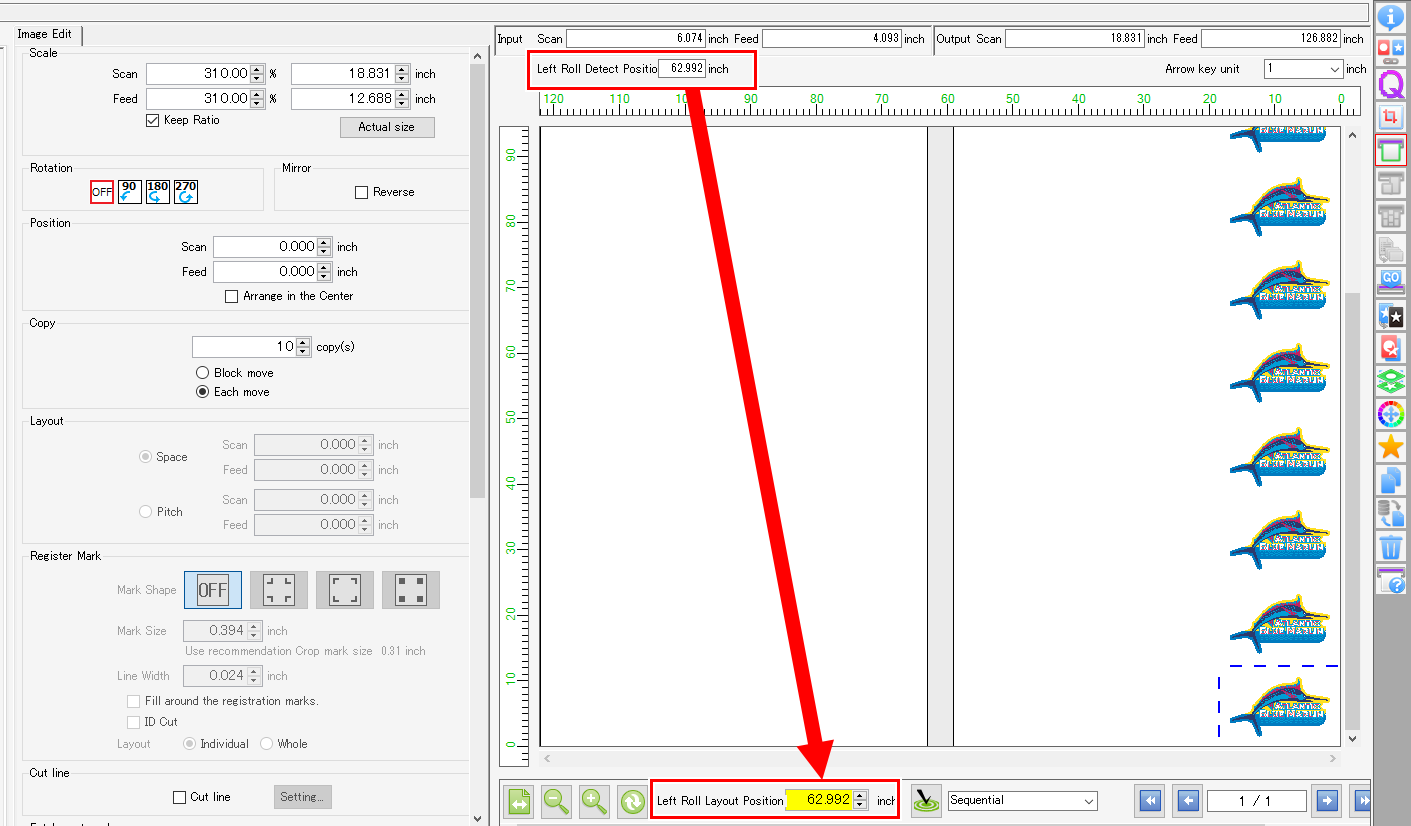
- Enter the value above shown for [Left Roll Detect Position] in [Left Roll Layout Position].
- Click the [
 ] icon.
- Check that [Each move] is selected with using [Copy] on the [Image Edit] tab.
- Click the [] icon.

- Use [Execute] to start printing.
Arrange multiple jobs and print on to two rolls
- Select multiple jobs on the [Job List] tab.
- Select [Arrange].
- Click [Arrange].
- Select [General Print].
- Check [Left Roll Detect Position], then enter the print origin for the left roll in [Left Roll Layout Position].
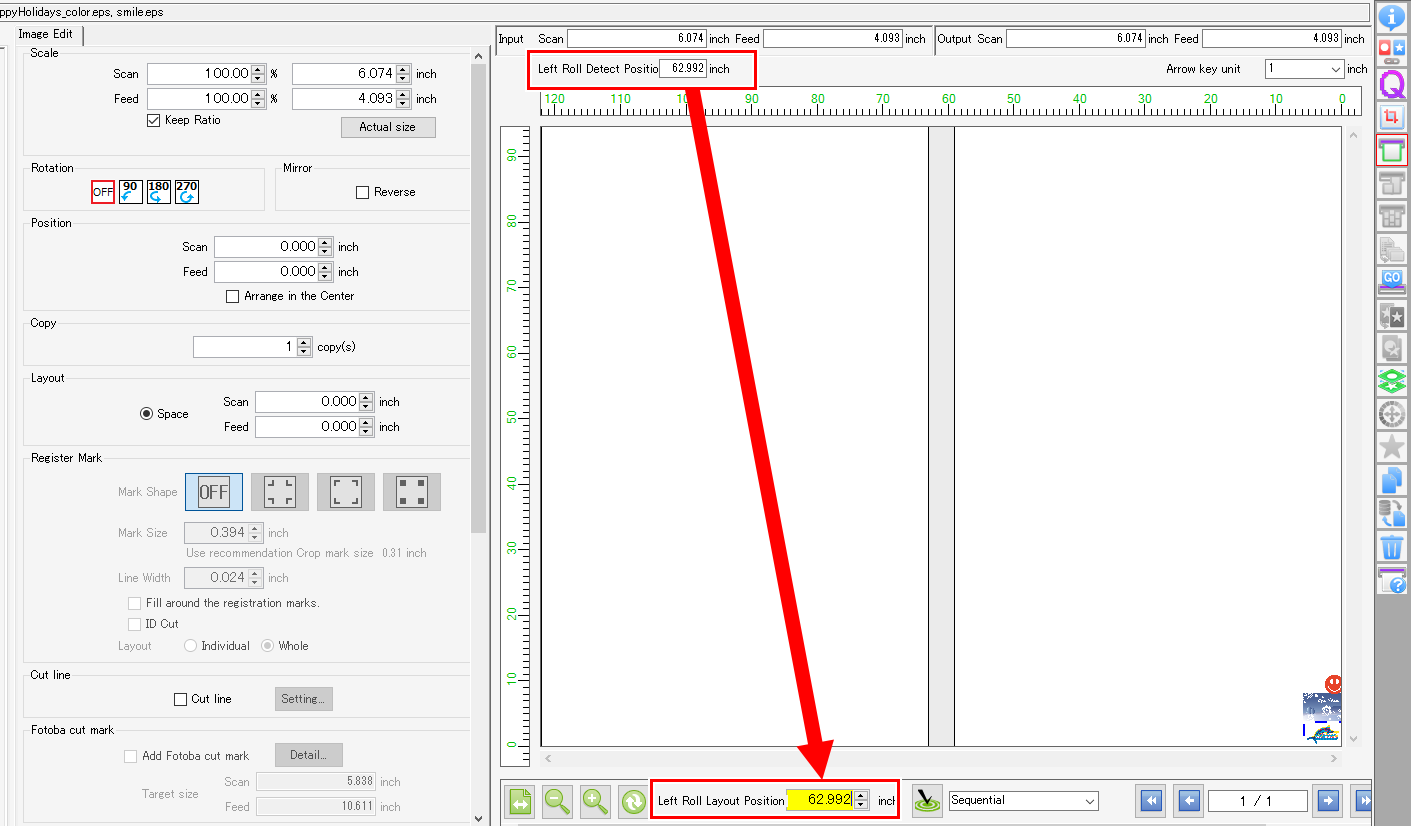
- Enter the value above shown for [Left Roll Detect Position] in [Left Roll Layout Position].
- Click the [] icon.

- Select the job to be copied on the [Job List] tab.
- Set the number of copies in [Copy] on the [Image Edit] tab.

- Click the [] icon.

- Use [Execute] to start printing.
Divide a job and print on two rolls
- Select one job on the [Job List] tab.
- Select [Tiling].
- Select the [Tiling Edit] check box on the [Divide Edit] tab.

- Select the [Free Location] check box on the [Layout] tab, then select [Nest] from the [Alignment Mode] list.

- Check [Left Roll Detect Position], then enter the print origin for the left roll in [Left Roll Layout Position].
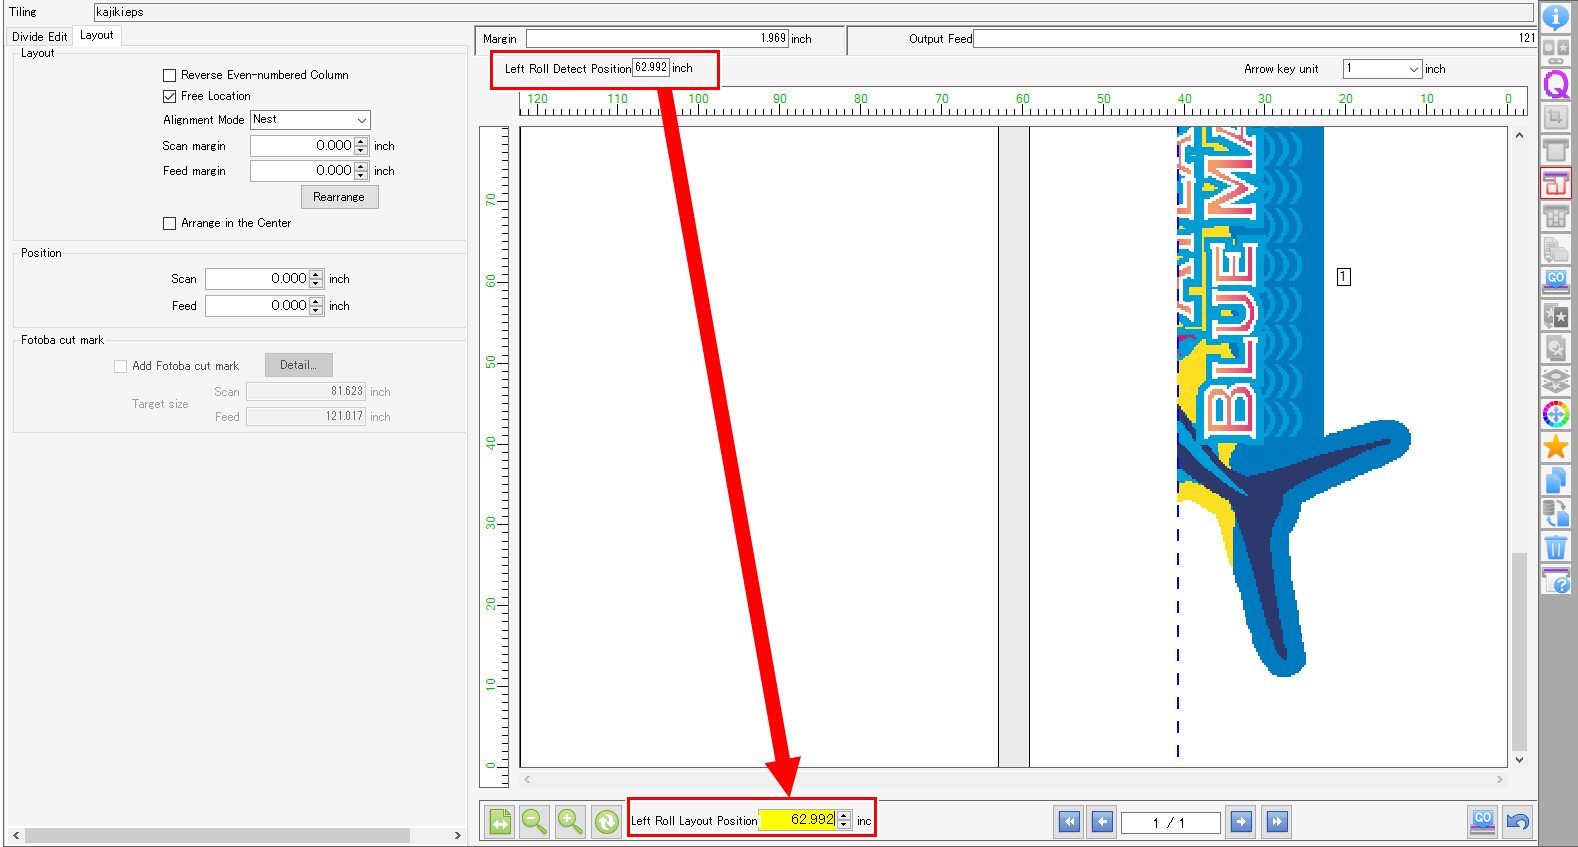
- Enter the value above shown for [Left Roll Detect Position] in [Left Roll Layout Position].
- Click [Rearrange].

- Use [Execute] to start printing.