Initial startup procedure
- On the desktop, double-click the [Mimaki RasterLink6Plus] icon
 .
.
- The [User Account Control] screen appears.

If you want to start RasterLink6Plus from the start menu, do the following:
- In Windows 7
From the [Start] menu, select [Mimaki RasterLink6Plus] - [Mimaki RasterLink6Plus]. - In Windows 8.1
At the bottom-left corner of the start screen, click the [Arrow] icon and select [Mimaki RasterLink6Plus] - [Mimaki RasterLink6Plus]. - In Windows 10 and 11
From the [Start] menu, select [All apps] - [Mimaki RasterLink6Plus] - [Mimaki RasterLink6Plus].
- Click [Yes].
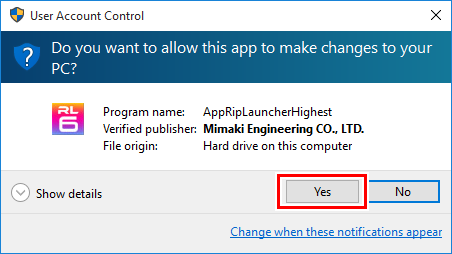
- If you see the symbol (shield) of the security center on the icon, executing the file shows the [User Account Control] screen. You then need to give authority to execute the file.
- In [Look In], select the working folder and then click [Choose].
- The folder to store working files for the job is created automatically under the selected folder.
- RasterLink6Plus is started.
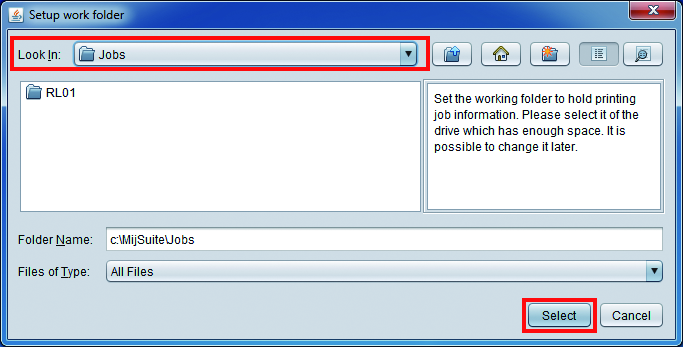
- Select the folder in a disk with sufficient free space.