Uninstallation procedure
This section explains the uninstallation procedure of RasterLink6Plus.

When you perform uninstallation, all the settings for RasterLink6Plus will be removed. Before starting uninstallation, check that:
- RasterLink6Plus is not running.
- The license for RasterLink6Plus has been deactivated.
- The hot holder for RasterLink6Plus is not open (even via the network).
- Any printers registered in RasterLink6Plus are not used (even via the network).
- The hot folder and printer for RasterLink6Plus are not shared via the network connection with Macintosh (such as SMB) for use.
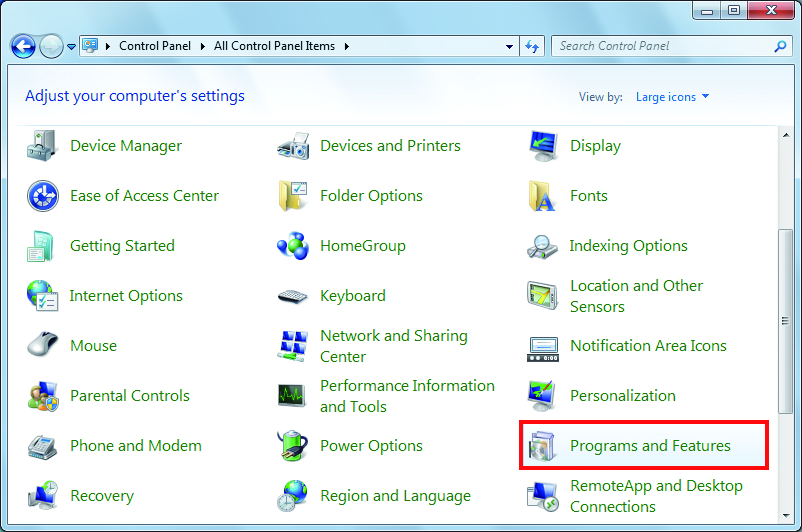
- In [Control Panel], double-click [Programs and Features].
- Depending on your OS, you may see [Add and Remove Programs], instead of [Programs and Features].

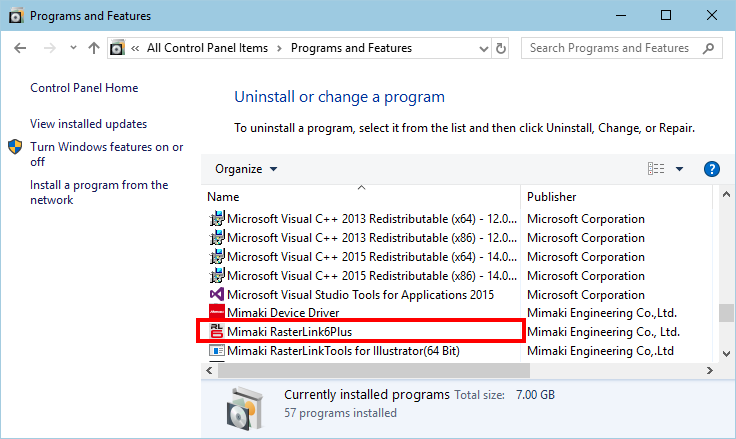
- From the list in the [Name] column, select [Mimaki RasterLink6Plus].

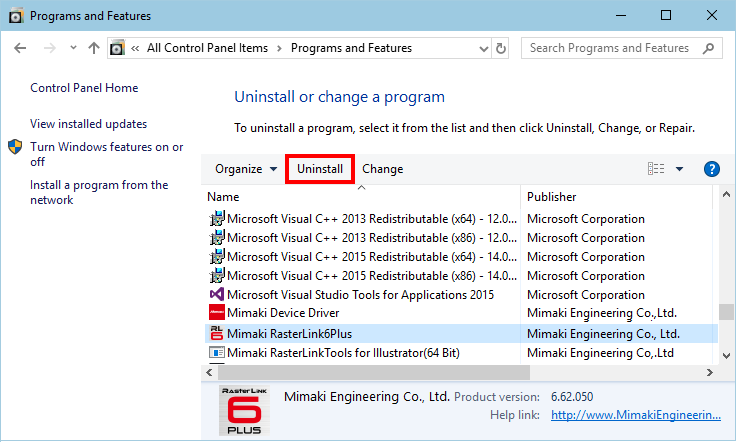
- Click [Uninstall].
- Depending on your OS, you may see [Remove].
- The [Programs and Features] dialog box appears.

- Click [Yes].
- The uninstallation is started.
![Confirmation dialog for uninstallation in [Programs and Features] window](https://d2w577gk9zpoty.cloudfront.net/themes/manual@mimaki/rasterlink6plus/installation_guide/en-US/../Images/png/9007199417815179__en-US__Web.png)

- If you have not deactivated the license, the screen to prompt you to do so appears.
When you click [Yes], the [Deactivation] screen appears.
How to deactivate the license
After deactivating the license, you can continue the uninstallation.
If you click [No], the uninstallation continues without license de-activation.
- You may see the message below during uninstallation. In this case, delete the installation folder manually after the uninstallation.

- Click [Yes] to restart the PC.
- The uninstallation is now completed.

If you reinstall RasterLink6Plus after uninstalling it, RasterLink6Plus may not work properly when the folders below remain. Make sure you delete the folders before reinstallation.
- Installation folder created in the previous installation
- Working folder used previously

