Manually Adding a Printer
If you cannot find the RasterLink PC in the browser list, perform manual installation according to the following procedures.
- In the toolbar of the [Add Printer] window, select the [
 ] or [
 ] icon (advanced settings).
- If there is no [] icon (advanced settings) in the toolbar, add one according to the following procedures.
- Press and hold the [Control] key while clicking on the toolbar, and then select [Customize tool bar] from the displayed pop-up menu.

- Drag the [] or [] icon (advanced settings) to the toolbar.
- Click [Done].

- In [Type], select [Windows printer via spoolss].

- For OS 10.5 to 10.6: Select [Windows].

- Input the following address for the [URL] and the printer name displayed on the Mac OC for the [Name].
- "Host name/Shared printer of smb://RasterLink6Plus name
or
- "IP address/Shared printer of smb://RasterLink6Plus"
Checking Host Name and IP Address Settings

- Select [Other] for [Use].
![Add Printer screen with [Other] selected from the [Print Using] menu](https://d2w577gk9zpoty.cloudfront.net/themes/manual@mimaki/rasterlink6plus/network_connection_guide/en-US/../Images/png/227536779__en-US__Web.png)
- In the mounted PPD folder, select "MKIJxEN.PPD", and then click [Open].
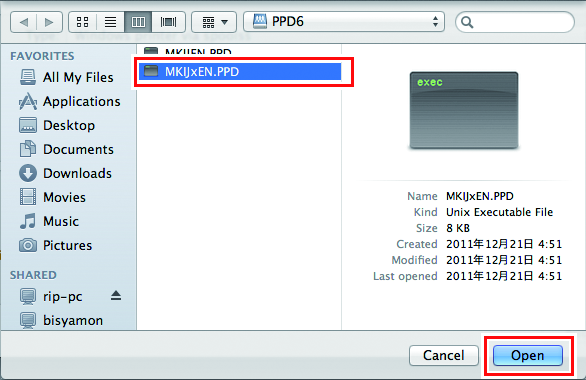

- Do not use "MKIJEN.PPD" with Macintosh.
- When "MKIJxEN.PPD" cannot be selected, select the driver referring to When "MKIJxEN.PPD" cannot be selected.
- Check that [MimakiInkjetPrinter(for OSX)] is displayed, and then click [Add].

- The added printer is displayed in the list.
