Printer Settings
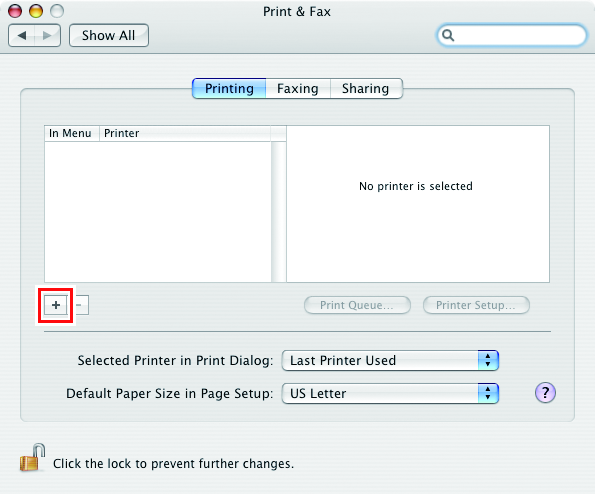
- In the [System Preferences] window, select [Print & Fax].


- Select [Finder] - [Utilities] - [Directory Access], and check that the check box next to [SMB/CIFS] is selected.
- Click [+].
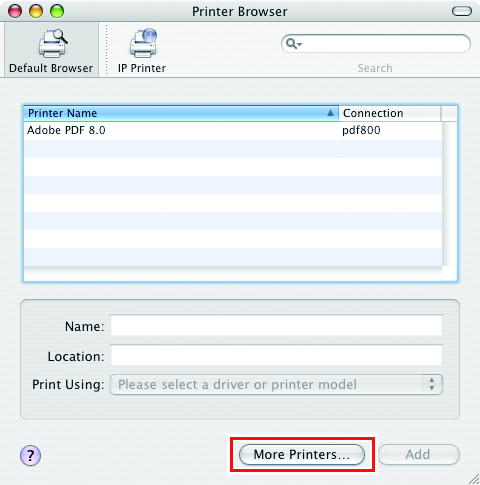
- Press and hold the [Option] key while clicking on [More Printers...].
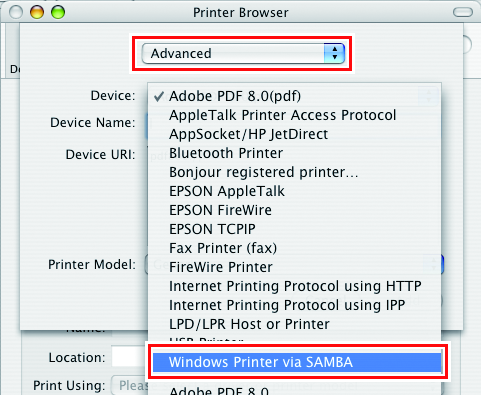
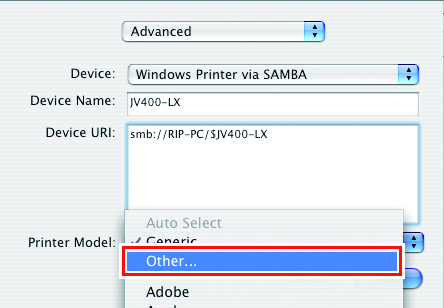
- In the top combo box, select [Advanced...], and then select [Windows Printer via SAMBA] for the [Device].
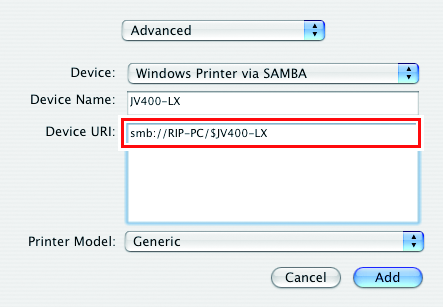
- Input a freely chosen name for the [Device Name].
- The printer name is displayed on the Mac OS.

- Input the following address for the [Device URL].
- "Host name/Shared printer of smb://RasterLink6Plus name
or
- "IP address/Shared printer of smb://RasterLink6Plus"
Checking Host Name and IP Address Settings
- Select [Other] for [Printer Model].
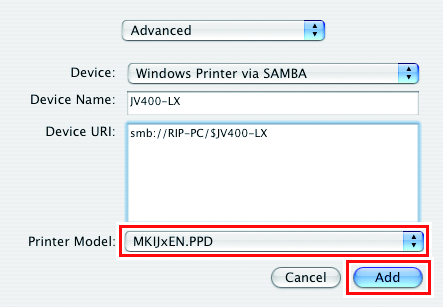
- In the mounted PPD folder, select "MKIJxEN.PPD", and then click [Choose].
- Do not use "MKIJEN.PPD" with Mac OS X.

- Check that the PPD file selected in step 8 is displayed for the [Printer Model], and then click [Add].
- The added printer is displayed in the list of the [Print & Fax] window.

- Repeat steps 2 to 9 to add more printers as necessary.