Printer Settings
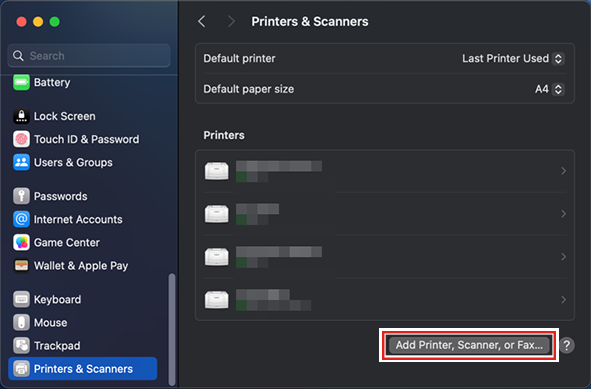
- In the [System Preferences] or [System Settings] window, select [Printers & Scanners].

- Click [+] or [Add Printer, Scanner, or Fax].

- From the icons at the top of the screen, select [Windows], and then select [rip-pc].


- If you cannot find the RasterLink PC using this screen, refer to Manually Adding a Printer and add the printer accordingly.
- Input the [Name] and [Password] of a user already registered in the RasterLink PC, and then click [Connect].
- If connecting using a guest account, select [Guest] for [Connect as].

- Select the printer to use, and select [Other] for [Use].

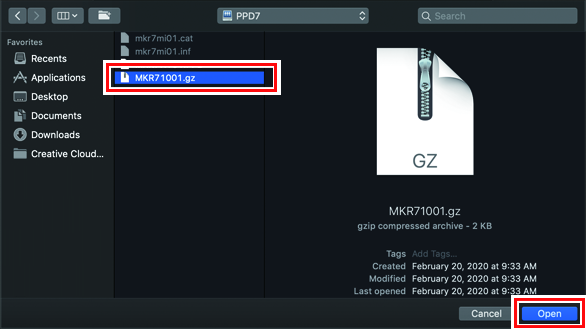
- In the mounted PPD7 folder, select "MKR71001.gz", and then click [Open].
- When "MKR71001.gz" cannot be selected, select the driver referring to When "MKR71001.gz" cannot be selected.
- Check that [MimakiInkjetPrinter(for macOS)] is displayed, and then click [Add].

- The added printer is displayed in the list.

- Repeat steps 2 to 7 to add more printers as necessary.