Color Collection - Operations
Check color registration settings
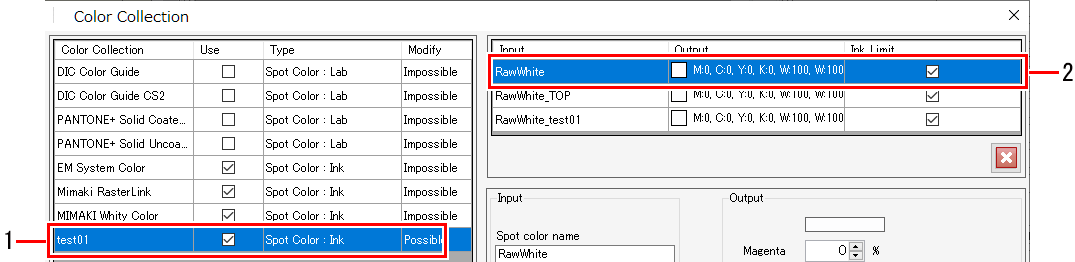
- Select a color collection file from the color collection list on the [Color Collection] screen.
- The color list is displayed.
- Select a color in the color list.
- The color settings before and after replacement are displayed in color registration.
Automatically replace a color in accordance with color collection settings
- Select the color collection to be used and select a [Use] check box in the color collection list on the [Color Collection] screen.
- Click the [
 ] icons to reorder the color collection.
- The color collection order of priority is modified.
- If the [Use] check box is selected for more than one color collection and they contain the same conditions, the color collections higher in the list will be applied.
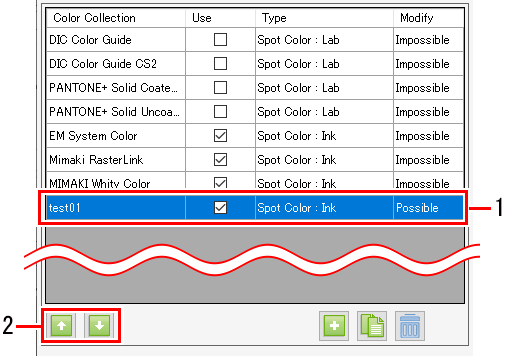

- The color collection will be applied automatically when a new image is imported.
Add a color collection
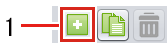
- Click the [
 ] icon on the color collection list on the [Color Collection] screen.
- The [Add] dialog appears.
- Select the color collection type in the [Type] list in the [Add] dialog.
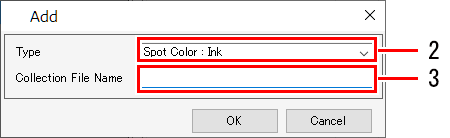
- Enter the color collection file name in [Collection File Name].
- The color collection is added.
Edit a color collection
- Select one color collection file from the color collection list on the [Color Collection] screen.
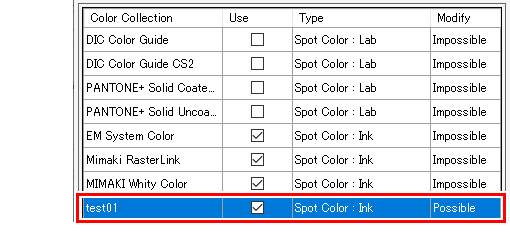
- Set the color information before replacement in [Input] in the register area.
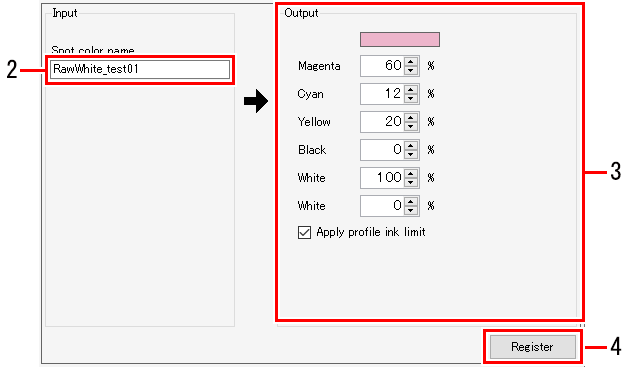
- The color information that can be set will vary depending on the color collection type. Refer toConditions.
- Set the color information after replacement in [Output] in the register area.
- The color information that can be set will vary depending on the color collection type. Refer toConditions.
- Click [Register].
- The color is added to the color list.
- To delete a color, select the color to be deleted in the color list, then click the [
 ] icon.
Duplicate a color collection
- Select the color collection to be duplicated in the color collection list on the [Color Collection] screen.
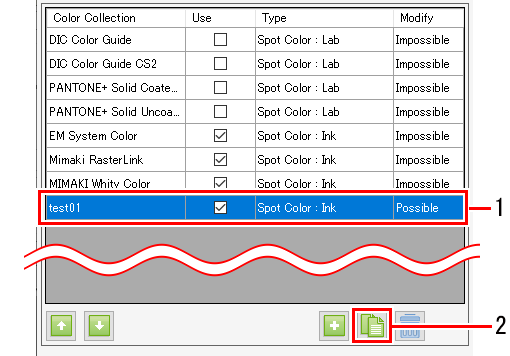
- Click the [
 ] icon.
- Enter the color collection file name in [Collection File Name] in the [Duplicate] dialog.
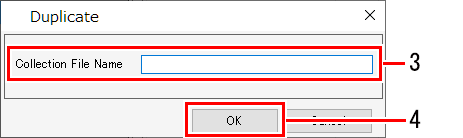
- Click [OK].
- The color collection is duplicated.
Delete a color collection
- Select the color collection to be deleted in the color collection list on the [Color Collection] screen.
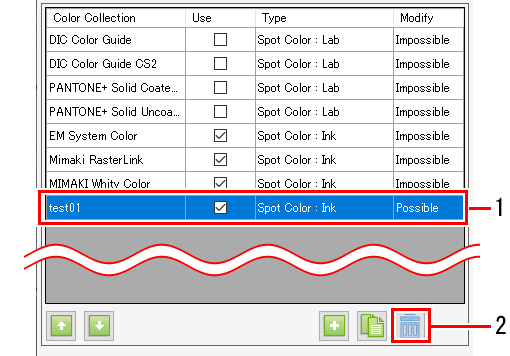
- Click the [
 ] icon.
- A [Confirmation] dialog appears.
- Clicking [Yes] deletes the color collection.

- Color collections cannot be deleted if [Modify] is indicated as [Impossible].
Create an Adobe Illustrator swatch file
- Select the color collection for which you want to create a swatch in the color collection list on the [Color Collection] screen.
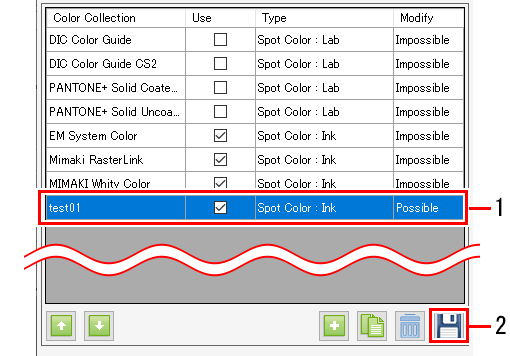
- Click the [
 ] icon.
- The [Select file name to save] dialog appears.
- Enter the file name for [File Name] in the [Select file name to save] dialog, then click [Save].
- An Adobe Illustrator swatch file will be created.
- The file types vary as follows due to the application used by the swatch file.
• For Adobe Illustrator : Illustrator (AI)
• For CorelDRAW X4 or lower : CorelDRAW(CPL)
• For CorelDRAW X5 or later : CorelDRAW(XML)
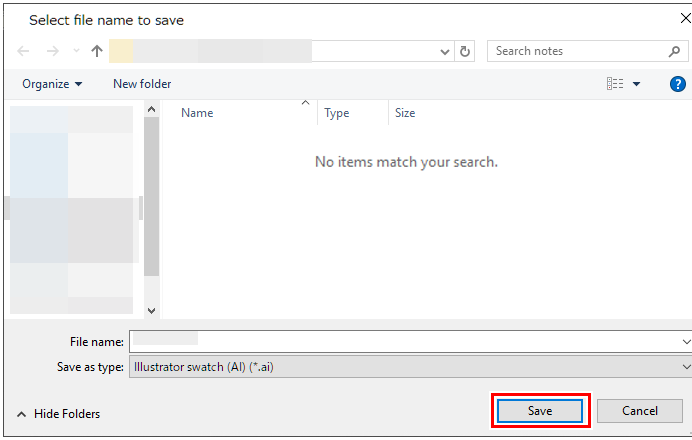
Adobe Illustrator swatch files cannot be created in the following cases.
- With color collections for which [Modify] is indicated as [Impossible]
- With color collection files for which [Type] is [Gradation], [CMYK: Ink], or [CMYK: Lab]