General Print - Screen Layout
[General Print] screen

[Job List] tab
Displays the arranged job.
The various settings for the selected job can be edited on the [Image Edit] tab.
[Image Edit] tab
| 1. [Scale] Enlarges and reduces the job. |
2. [Rotation] Rotates the job. | |
3. [Mirror] Reverses the job. | |
4. [Deskew] Tilts the job in the range of -45° to +45°. | |
5. [Position] Sets the origin position for each job. Selecting the [Lock the trimming position] check box locks the trimming origin position in the display. | |
6. [Copy] Copies and positions the job. | |
7. [Placement] Specifies the layout of arranged jobs and copied jobs. | |
8. [Printing page range] (with multi-page jobs) Sets the page(s) to be printed in the case of multi-page jobs(*). | |
9. [FF (Form-feed)] (for multi-page jobs) Sets how form-feed code is sent. | |
10. [Print Area] (with flatbed printers) Sets the valid print area to match the size of the media to be printed. | |
11. [Register Mark] Sets register marks. | |
12. [Cut line] Selecting the check box prints cut lines around the job. | |
13. [Fotoba cut mark] Selecting the check box prints cut marks used with the Fotoba Series (high-speed finishing cutter machine). | |
14. [XY Slitter] Selecting the check box prints marks and reference lines for slitting.Set the XY slitter | |
15. [Information Label] Selects information to be printed. |

(*) Jobs that contain multiple images within a single file, such as PDF and TIFF multi-page files, are referred to as multi-page jobs.
Preview
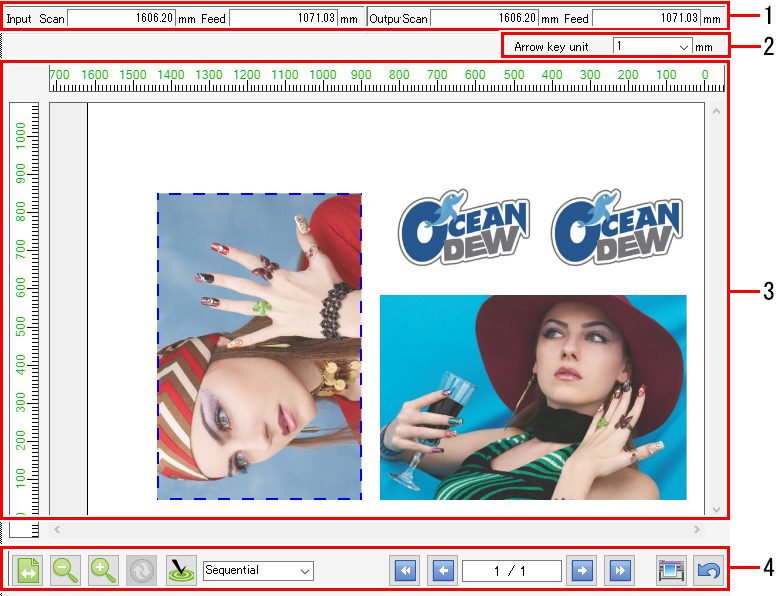
- [Input], [Output]
- [Input] displays the original data size of the selected job.
[Output] displays the size to be output. - [Cursor Key Unit]
- The job selected by clicking in the preview can be moved by using the cursor keys on the keyboard.
This setting allows you to specify the amount by which the job moves each time a cursor key is pressed. - Layout Preview
- Displays the layout in which the job(s) will be printed.
The valid print area (within the media) is shown in the layout preview as white, and areas outside this are shown as gray.
The following operations can be performed on jobs selected individually in the layout preview using the mouse. (Multiple jobs cannot be selected simultaneously.) - Edit the settings for the various items in [Image Edit]
- Drag and move jobs
- Move jobs using the cursor keys
- With a flatbed printer
- When multiple jobs have been arranged or copied, they may not fit on a single panel, making it necessary to print several times.
In such cases, click the [ ] icon to create a new panel on which the jobs can be placed.
 - If there are multiple panels, the display indicating the number of panels at the bottom of the screen changes to red. The [
 ] icons can be clicked to select the individual panel to be previewed.
- Icons
| Display using media width Displays the layout preview width using the media width. | |
| Zoom out Reduces the layout preview display size. | |
| Zoom in Increases the layout preview display size. | |
| Refresh media width Displayed when using a roll-to-roll printer. | |
| Optimize Selecting an alignment mode[Arrange] screen, then clicking the [ | |
| Execute Rips and prints. The processing used for execution can be set in [Option] - [Job Control] ([Option]). | |
| Undo Restores the settings for when the [General Print] screen was first opened. |


