Color Replacement - Operations
Replace a spot color or CMYK

- For more information on original image data settings, refer to Precautions when replacing spot colors.
- Select the job for color replacement on the [Job List] tab.
- Click [Color Replacement] in the [Function] menu or the [Color Replacement] function icon (
 ).
).
- Select the [Spot Color] tab or [CMYK] tab on the [Color Replacement] screen.
- The spot color or CMYK process colors used in the image data are displayed.
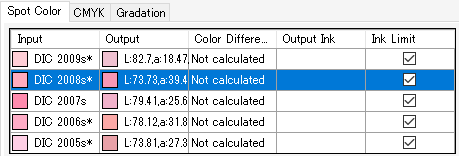
- Select the spot color or CMYK process color you wish to replace from the list.
- Select the [Replace] check box for [Ink after replacement].
- Select [Ink] or [Lab].
- Sets the color after replacement.
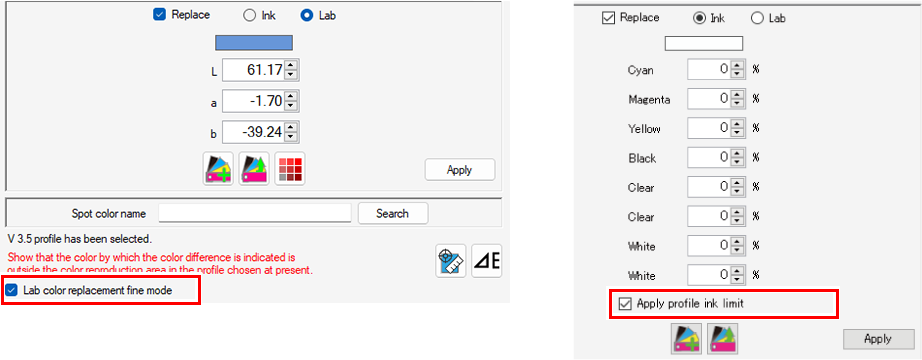
- Set the percentage if [Ink] is selected, and set the L*a*b* values if [Lab] is selected.

- This is displayed when [Ink] is selected.
- Enabling this applies the device profile ink limit.
- The setting is automatically converted to a lower value to minimize ink overflowing when printing. (Even if set to 100%, a lower value is used for printing.)
- When not selected, printing uses the color component values as set, but this increases the possibility of printing defects such as bleeding due to ink overflowing. Where possible, this setting should normally be selected.
- It is automatically enabled if the special color inkset uses three or more slots.
- This mode is displayed when [Lab] is selected with a profile of V3.5 or later selected.
- When turned on, the resolution of numerical values is higher than Ver. 3.1.0 or earlier, and more detailed numerical values can be specified.
- Enabling this relaxes the detection error for input density compared to when it is not used, extending the range for color replacement.
Try enabling this if the intended area is not included within the color replacement area.
Example: In cases where color replacement was set for an input density of Cyan 50%, but an area with Cyan 49.5% was not replaced.
- Click [Apply].
- If color replacement is performed using color ink and special color ink at the same time, printing will be as follows depending on the special color overlay printing settings Layer - Operations in the printer and layer settings.
- Special Color Over Print not used: The special color and color will be printed simultaneously. The special color ink and color ink will appear to intermix.
Color ⇒ Special color: The color ink will be printed first, then overprinted with the special color.
Special color ⇒ Color: The special color ink will be printed first, then overprinted with the color. - If color replacement is performed using different special color inks at the same time, the results will differ depending on the particular model and settings.
Replace a gradation color
- For more information on original image data settings, refer to Precautions when replacing gradation colors and Precautions when replacing spot colors.
- Select the job for color replacement on the [Job List] tab.
- Click [Color Replacement] in the [Function] menu or the [Color Replacement] function icon ().
- Select the [Gradation] tab on the [Color Replacement] screen.
- The gradations used in the original image data are displayed.

- Select the gradation you wish to replace with a different color.
- Select the [Replace] check box for Ink after replacement.
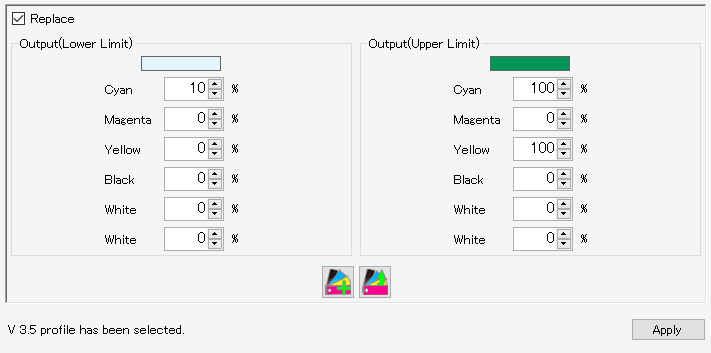
- [Output (Lower Limit)]: Sets the minimum density for the gradation after color replacement.
- [Output (Upper Limit)]: Sets the maximum density for the gradation after color replacement.
- Click [Apply].
- Enabling this relaxes the detection error for input density compared to when it is not used, extending the range for color replacement.
Try enabling this if the intended area is not included within the color replacement area.
Example: In cases where color replacement was set for an input density of Cyan 50%, but an area with Cyan 49.5% was not replaced.
Replace a color using a colorimeter
- If a v3.5 or later device profile has been selected on the [Print Condition] screen, a colorimeter can be used.
- Click the [
 ] icon.
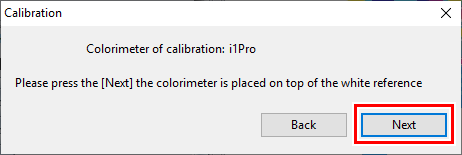
- The [Calibration] dialog appears.
- Place the colorimeter on the white datum, then click [Next].
- The Spot Measurement screen appears once white datum measurement is complete.
- Select the color to be measured from the list.
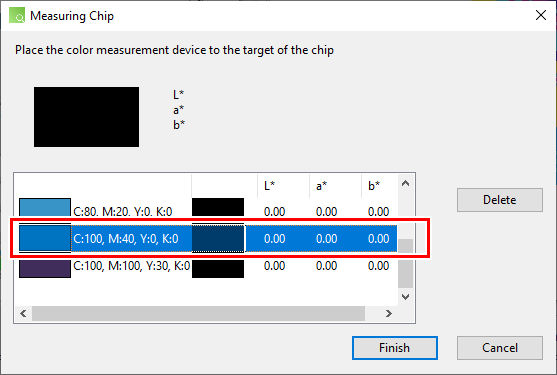
- Hold the corresponding color against the colorimeter, then click the colorimeter button.
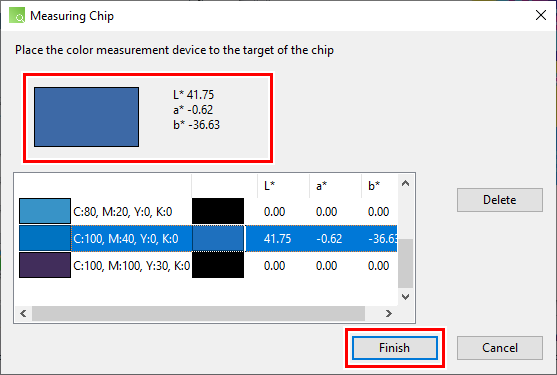
- The color measurement results (L*a*b* values) are displayed.
To continue and measure other colors, repeat steps (3) and (4).
- Click [Back].
- The measured L*a*b* values are displayed.
- If [Uncalculated] is displayed in the [Color Difference] column of the Input/output color list, click the [
 ] icon. The information for the color difference and output ink is calculated and displayed.
Select from a color collection
Select color replacement information from a color collection and apply it to a job.
- Select the job for color replacement on the [Job List] tab.
- Click [Color Replacement] in the [Function] menu or the [Color Replacement] function icon ().
- Select the [Replace] check box for Ink after replacement.
- Click the [
 ] icon.
- The [Import from Color Collection] dialog appears.
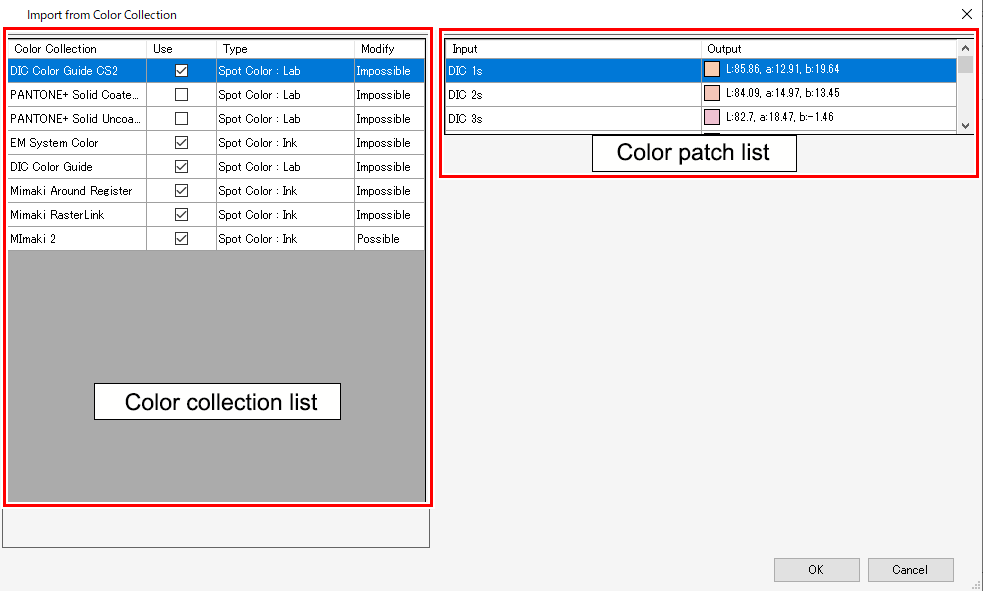
- Select the color collection to be used from the color collection list.
- Select the color to be set as the color after replacement from the color patch list.
- Click [OK].
- [Output] is refreshed on the input/output color list.
Register to a color collection
Register color replacement information to a color collection.
- Select the colors for which color replacement is set in the input and output lists on the [Color Replacement] screen.
- Click the [
 ] icon.
- The [Export to Color Collection] dialog appears.
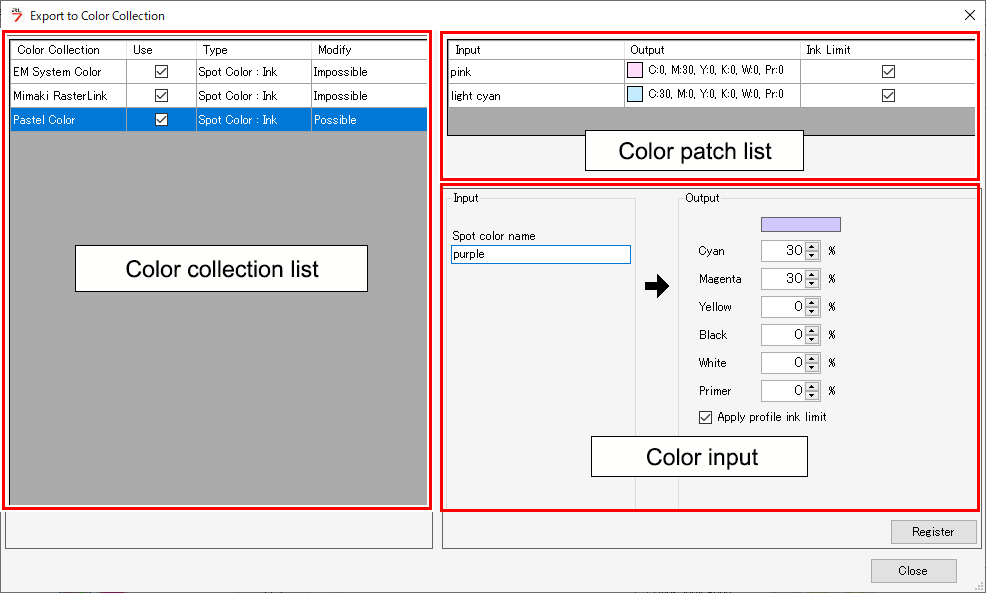
- Select the color collection to be registered from the color collection list.
- Check that the color information to be registered is set in the color input area.
- Click [Register].
- The color is registered in the color patch list.
Restrictions on the Color Replacement function
The Color Replacement function is restricted for the following models/ink sets.
- Models: UJF-6042MkII, UJF-6042MkIIe
- Ink set: CMYK+ClPWW
Restrictions are as follows.
- Color Replacement to primer is not available.
- Color Replacement to clear is not available.
For corresponding models/ink sets, use single color replacement or Special plate function.
If the image data input contains "ClearTexture" spot color name, uncheck the "Use" check box of the "Mimaki RasterLink" color collection before inputting the image data.
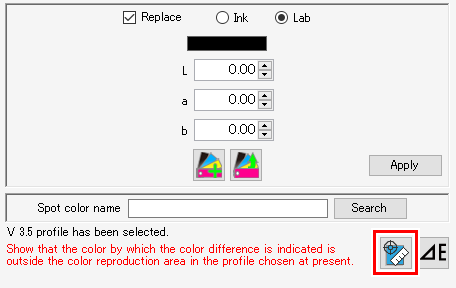
Print a color chart based on the color after replacement
A Lab color chart can be created with the set color used as the base color if the color after replacement is Lab.
This is useful for adjusting the color after the color replaced image has been output.
For more information on Lab color charts, refer to Lab Color Chart.
- Select the color to be replaced from the list.
- Select the [Replace] check box for [Ink after replacement] if it is not already selected.
- Select [Lab], then set the Lab after replacement.
- Click the [
 ] icon.
