- There are two methods for setting it up, one through the printer and the other through RasterLink.
Please choose according to your usage preferences.
[How to set the heater temperature using the printer]
(1) On the LOCAL mode screen, press the FUNCTION key and select [SETUP] > [SETUP 1 to 4] > [HEATER].
(2) Set the temperature for each heater.
Please refer to the "Operation Manual" for HEATER setting.
JV400-LX: Operation Manual
JV400-SUV: Operation Manual
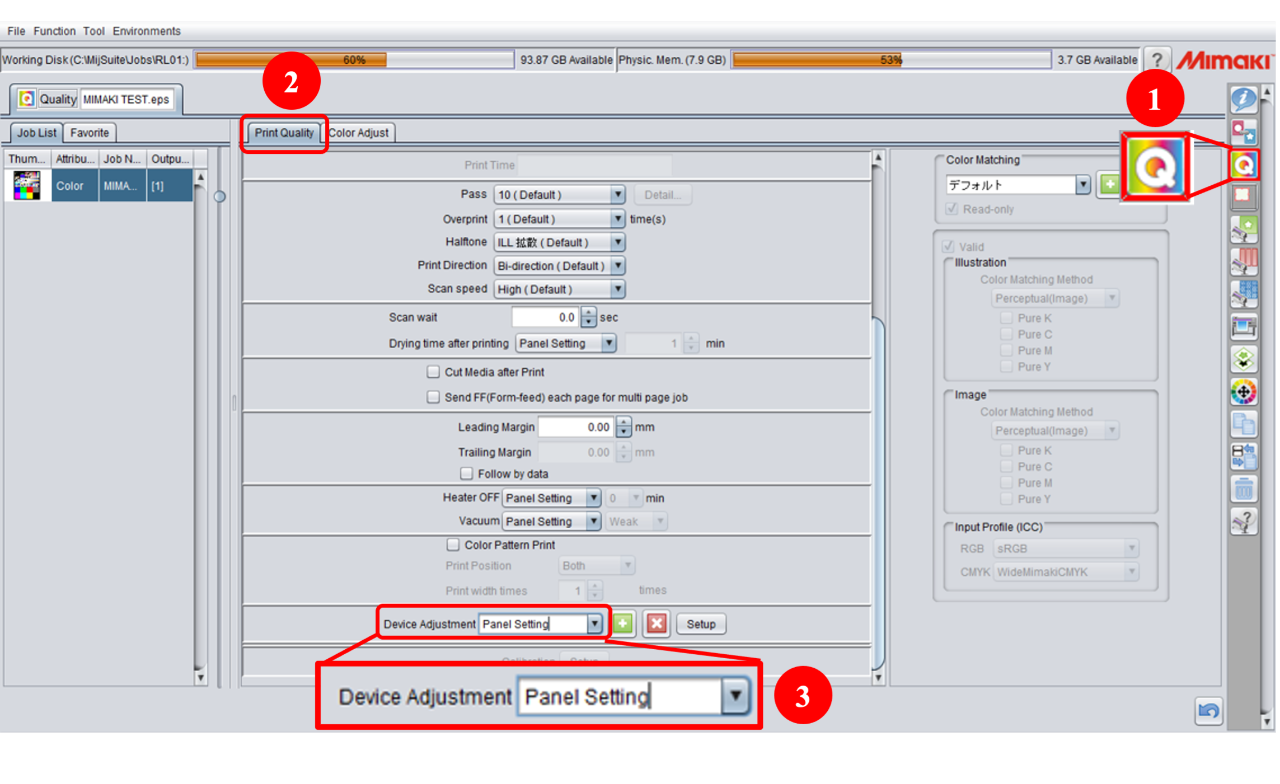
2. Configure RasterLink to enable the printer's heater temperature.

(1) Click the [Quality] (Print Condition) icon.
(2) Open the [Print Quality] tab.
(3) Set [Device Adjustment] to "Panel Setting".
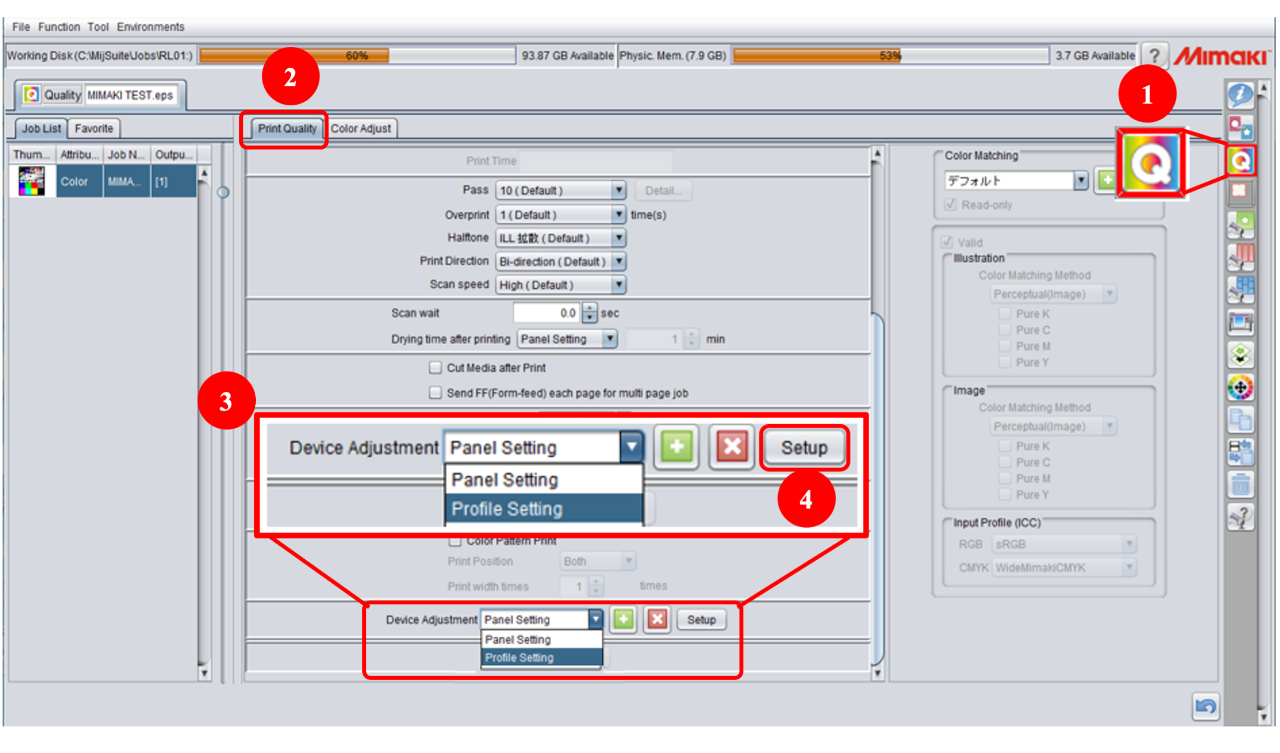
[How to set the heater temperature in RasterLink]

(1) Click the [Quality] (Print Condition) icon.
(2) Open the [Print Quality] tab.
(3) Select "Panel Setting"*1, "Profile Setting"*2 or "Device Adjustment Set"*3 in [Device Adjustment].
(4) Click the [Setup] button to confirm and change the heater temperature setting.
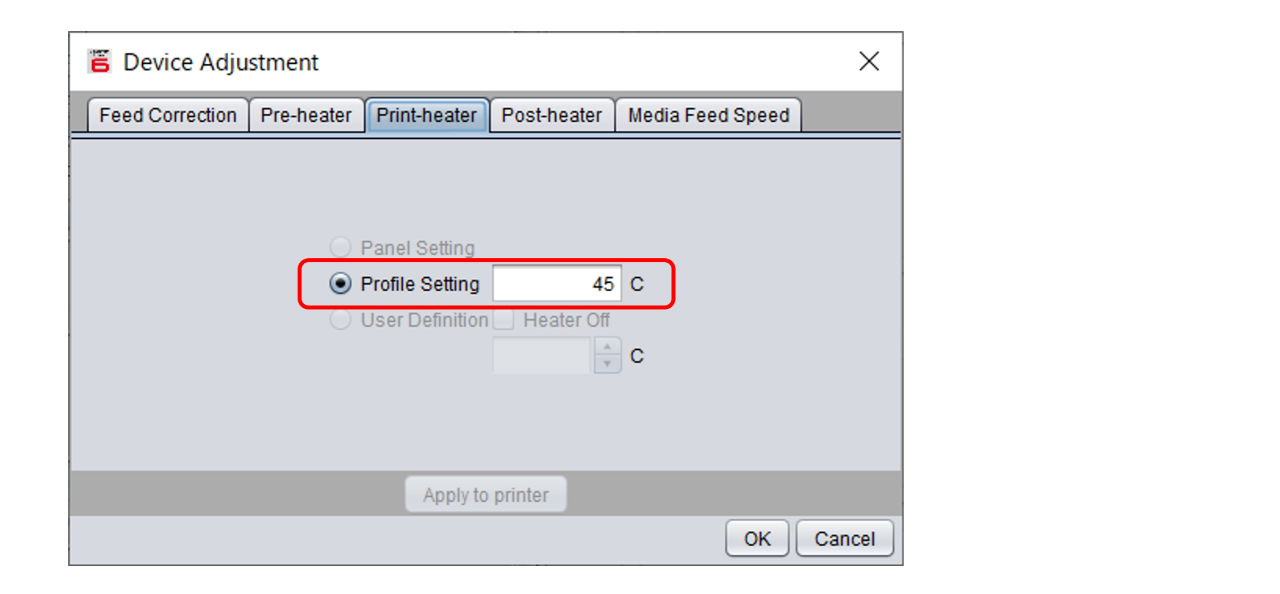
*1. If "Profile Setting" is selected;
the temperature registered in the selected device profile will be automatically applied.

*2. If "Device Adjustment Set" is selected;
"A Device Adjustment Set" is a file that you name and register in the Device Adjustment Input Box.
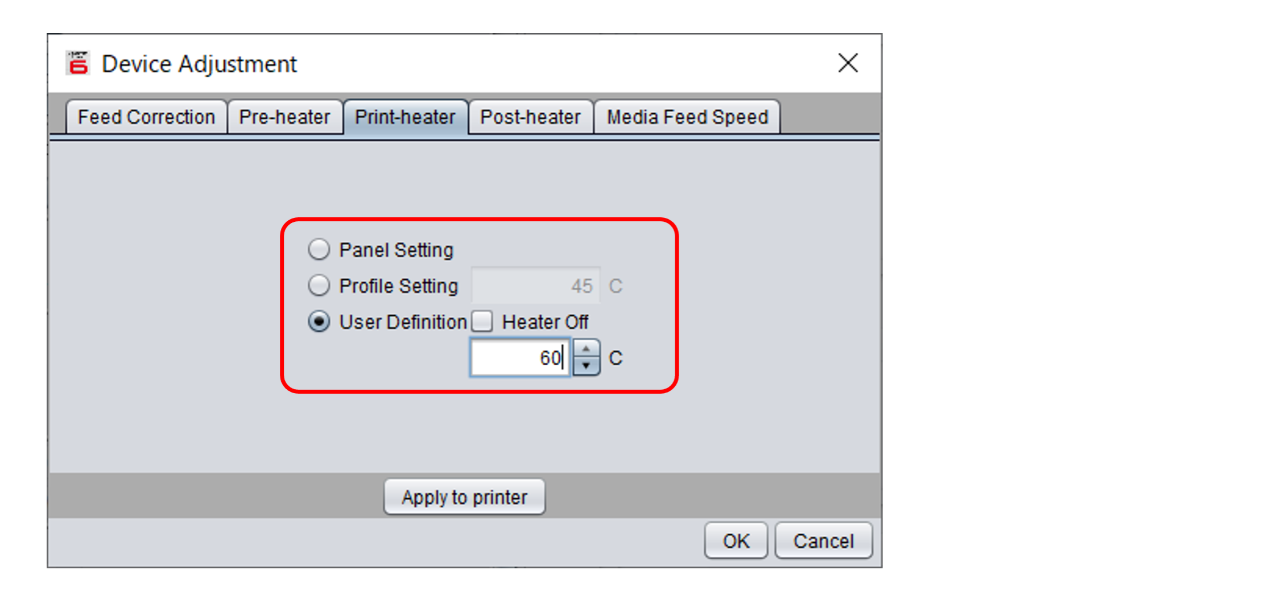
The temperature for each heater can be configured using options such as "Panel Setting," "Profile Setting," or "User Definition."
You can add a new Device Adjustment Set by entering a name into the Device Adjustment Input Box and clicking the [+] button.

- Panel Setting : the heater temperature set by printer is applied.
- Profile Setting : the heater temperature registered in the selected device profile is applied.
- User Definition : the heater temperature can be entered arbitrarily.
* If "Heater off" is checked, the heater is not used.
Please refer to the "Operation Manual" for details.
JV400-LX: Operation Manual
JV400-SUV: Operation Manual
